Showing posts with label recipe. Show all posts

Saturday, February 21, 2015

Hot Breakfast on a Cold Day: Breakfast Burritos

The temperature is 14 degrees outside, which is pretty low for us Virginians! What could be better than a nice, hot breakfast on a snowy, cold morning? Today I made breakfast burritos for my family.


Breakfast Burritos
(Makes 6 burritos)

Ingredients:
  • 6 flour tortillas
    Can't wait to eat this hot burrito!
  • 6-8 bacon strips
  • 6-8 eggs
  • 1/2 cup of shredded cheese (I used a blend of Mexican cheese)
  • Additional shredded cheese to assemble the burritos (to taste)
  • About 1 cup of chopped veggies (I used onions and red peppers)
  • 1 avocado, cut in slices
  • Salt and pepper to taste (I skipped these because the bacon was salty enough for us)
  • Hot Sauce (optional, but highly recommended)


Directions:

1. Cook the bacon strips in a frying pan until they are nice and crispy. Once the bacon is done, place the strips on a paper towel to get rid of some of the grease.  Once the strips are cool, chop them up into small chunks.
Optional: Reserve the grease left in the pan (see next step)
2. Fry the vegetables in a bit of oil
Optional: I used the bacon grease to fry the veggies (I removed some of the oil from the pan, though). I don’t do this often because this has to be bad for us, but it is such a nice treat! Also, this means I have to wash only one frying pan.
Here are my fried veggies - fried in bacon sauce! Yum!

3. Whisk the eggs and add them to the pan once the vegetables are done. Stir frequently to make sure the eggs don’t stick to the pan and cook evenly. Wait until the eggs look almost done, and then…
4. Add the bacon bits and the cheese to the egg/veggie mix, and finish cooking the eggs. If you’re going to add salt and/or pepper, do so now.
Here are the eggs. Almost done!

5. Warm up the tortillas in the microwave.  Heat them up for about 15 seconds.
6. On each tortilla, sprinkle cheese and top it with a couple of tablespoons of the egg/veggie mix.  Then, add the avocado slices on top.
Don't forget the hot sauce! 

Optional: Sprinkle a bit of hot sauce on top of the avocados and eggs.
7. Wrap the tortilla to make a classic burrito.


Done!
Enjoy!

Sunday, January 11, 2015

Chicken Fried Steak

Chicken Fried Steak, Mashed Potatoes, and Green Beans. Yummy!
Today I made a delicious Southern dish at home: Chicken Fried Steak.  I found a wonderful recipe provided by Pioneer Woman (I recommend watching the video as well), though I made a few adjustments:

  • I seasoned the steaks about two hours ahead of time. I used Wegmans Garlic and Herb seasoning, but I suppose any seasoning would work. McCormick has a similar seasoning available.  
  • I skipped the cayenne pepper but kept the paprika in the flour mixture.  
  • I added a bit of the garlic and herb seasoning to the flour as well.
  • To make the gravy, I followed Alton Brown’s instructions.  This means that I added chicken broth to enhance the flavor of the gravy.  I skipped the thyme Alton recommended, though. Again, watching the video was really helpful!
This is not a healthy meal; it has quite a bit of grease. However, the meal was a great treat, and I will definitely cook this again!

Monday, September 29, 2014

Chicken with Quinoa

I am a fan of quinoa, so I'm always looking for new ways to serve it.

Here is a nice dish of chicken, quinoa, and broccoli.  This is a quick, 30-minute dish (plus prep-time) that is both filling and ... uh... not unhealthy. :-)
This was a succulent dish!

Quinoa:
I cooked one cup of quinoa in two cups of boiling water.  I usually add 1/2 teaspoon of chicken or vegetable bouillon powder (or half a solid bouillon) to the water to give the quinoa some flavor.

Cooking time varies, but it usually takes about 35 minutes for the water to evaporate.  I cook the quinoa covered and in low heat.

Broccoli: 
This side dish could not be easier.  I steamed frozen broccoli (though I could also use a microwavable bag) to cook it.  For flavor, I added Wegmans basting oil, though this oil could be replaced by a mixture of olive oil and my favorite herbs. I also sprinkled the broccoli with salt and pepper to taste.

Chicken:
Ingredients:
3 Chicken Breasts, cut in cubes
1 pack of Swanson Flavor Boost or Knorr Homestyle Stock (chicken or vegetable flavor)
1/2 cup of chopped veggies.  I used onions and red peppers

First, I sauteed the veggies. Then, I remove them from the pan and cooked the three chicken breasts;  I browned them in a pan at medium/high heat.  Once the chicken is cooked, I lowered the heat to medium and added back the cooked veggies and the broth/flavor boost pack to the pan. I also added about 1/2 cup of water and brought the broth to a gentle boil.

Once the broth boiled, I lowered the heat once again and covered the pan.  It took about 15 minutes for the chicken to cook (though I always test one piece before I turn off the heat).

Once everything is cooked, I can serve the quinoa with a bit of the sauce from the chicken on top (see the picture above). I absolutely love this dish!

Friday, January 24, 2014

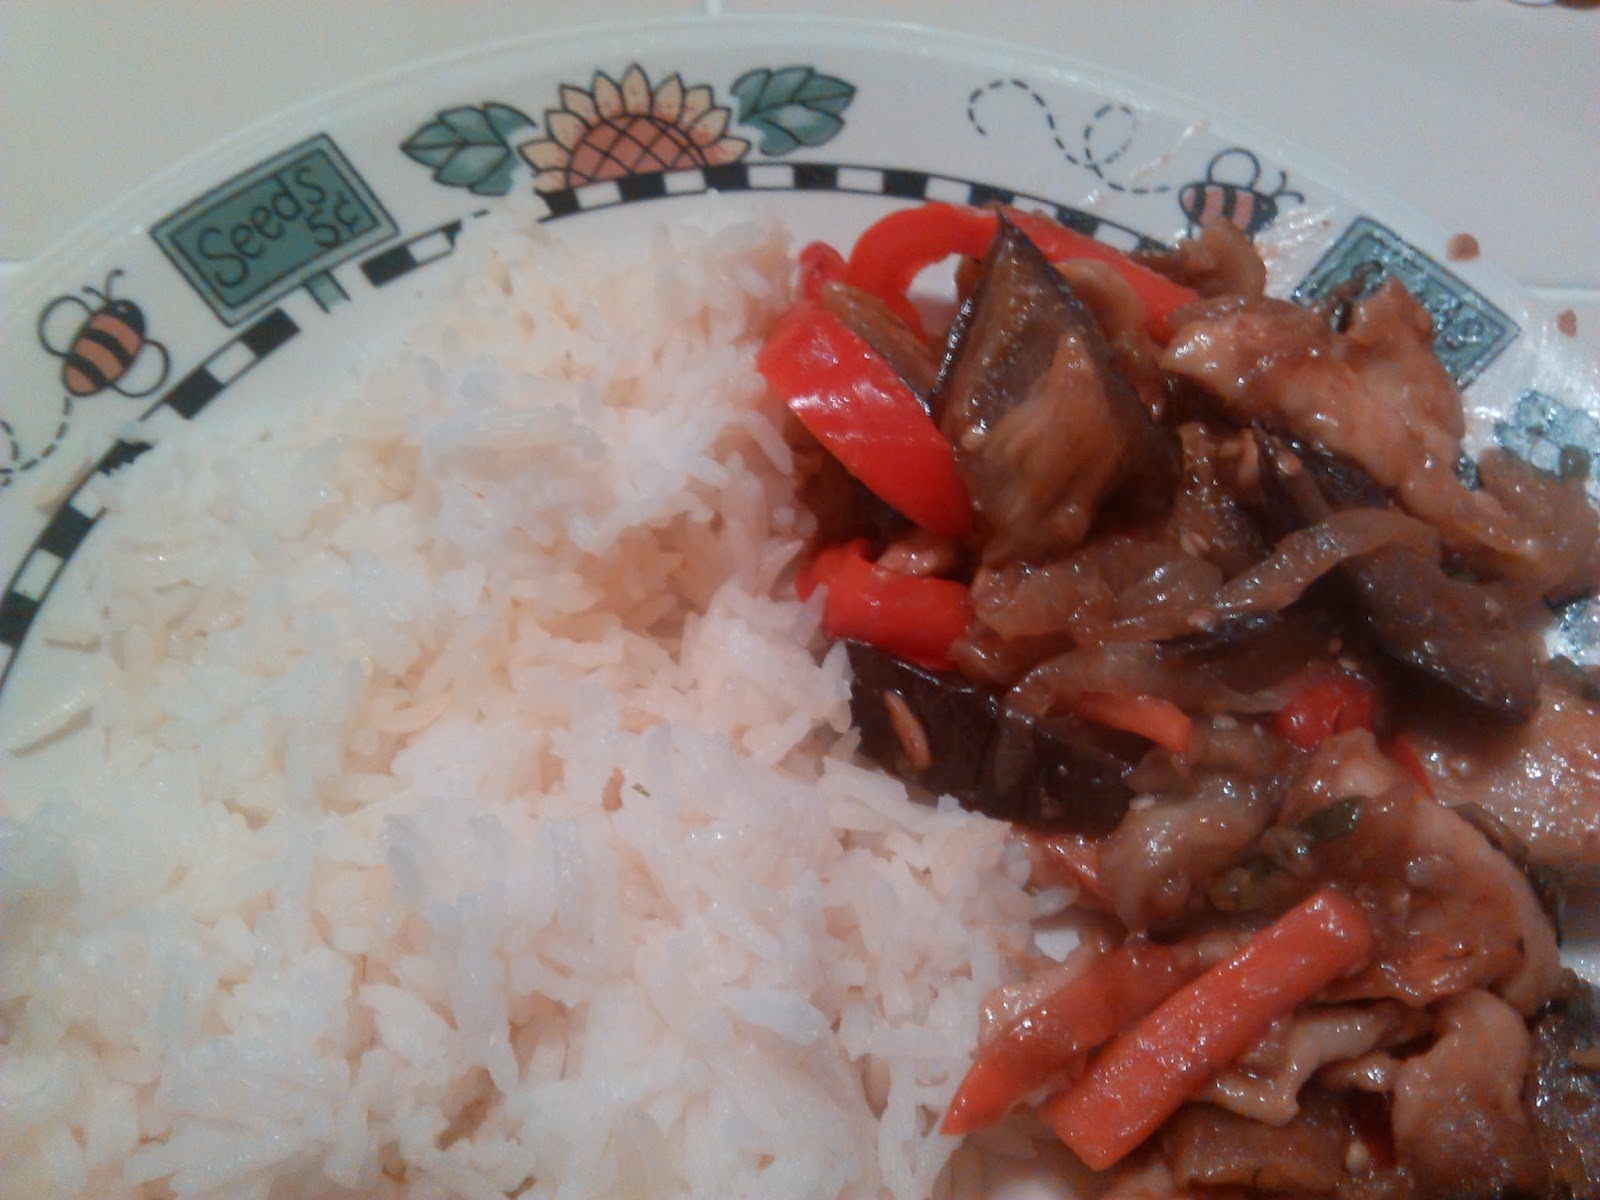
Asian-Inspired Eggplant (and Chicken!)

Serves 4-6 people

I modified a vegetarian (and spicy) Wegmans recipe by adding a bit of chicken and changing the sauce. This recipe allowed us to reduce the amount of meat we consume at dinner time. The eggplant was surprisingly good and quite filling.

Ingredients:

* 1 eggplant
* 2 or 3 cups of your favorite stir-fry vegetables. 
I used strips of red peppers, onions, and mushroom. I also added very thin carrots sticks and sliced squash.
* 1 lb. of chicken cut in small chunks (or another eggplant if you wish to keep this a vegetarian dish).

For the sauce:
Stir Fry Sauce
General Tso’s Sauce
Lee Kum Kee Chili Garlic Sauce
Soy sauce

To make the sauce:

Fill 2/3 cup of equal parts of stir-fry sauce and General Tso’s sauce.  I used the Wegmans brand. I also added a few drops of soy sauce and, to add a kick, 1/2 teaspoon of Lee Kum Kee Chili Garlic Sauce. You can add more chili garlic sauce if you like spicy food

Directions:

1. Cut the eggplant in slices and then in sticks - about half an inch thick. Place these sticks and the squash in a steamer or use a microwave bag to cook them.   
Optional: You may choose to fry the eggplant and the squash with the rest of the vegetables instead. Take a look at the next step.

2. Stir fry the vegetables in a wok or frying pan (and if you wish, you may fry the eggplant as squash as well instead of steaming them).
Suggestion: Fry the carrots, peppers, and onions first. Then, add the softer veggies, such as mushrooms (and the eggplant and squash if you don’t want to steam them).


3. Remove the vegetables from the wok and cook the chicken well. Then, add the vegetables and the sauce to taste.

Hint: Don’t add too much sauce. You don’t want to mask the taste of the veggies.


That’s it.


I served my eggplant and chicken dish with white rice. Delicious!


Wednesday, December 11, 2013

Last-Minute Enchiladas

“It’s the middle of the week, and dinner time is fast approaching. What can I make for dinner?”

This is how Last-Minute Enchiladas came to be.  I had a few chicken breasts in the freezer, and that I was not going to make pasta again!

This recipe is quick and easy. There are quite a few shortcuts that make preparation a breeze.

Looks like a lasagna,doesn't it? :-)

Serves: 3-4 people (about 7 large enchiladas)

Ingredients:

*Three chicken breasts (the ones I used were frozen)
*Flour tortillas (I prefer these because they are softer than corn tortillas)
*A jar (16 oz) of your favorite Salsa.  I used Wegmans’ mild salsa.
*1 or 2 cups of shredded Mexican cheese
*2 cups of veggies (sliced or “julienne”).  I used onions and peppers of different colors: red, orange, and yellow
*1 teaspoon of chili powder
*Additional salt to taste

For the broth and to cook the chicken:

*Enough water to cover the chicken (4 to 6 cups)
*Veggies.  I used chunks of onions and peppers, and a few garlic gloves
*One chicken bouillon

Getting all of the ingredients ready:
  • Begin by boiling the water with all the ingredients listed for the broth (see above).
  • Once the water boils, place the frozen chicken and wait for the water to boil again. Lower the temperature to medium, and let the chicken cook for about 15-20 minutes.  Make sure the chicken is fully cooked before you remove it from the water to let it cool down.
  • Sauté the sliced peppers and onions in olive oil.
  • In a medium pot, combine the salsa and a cup of the chicken broth (the leftover water from the chicken you just cooked), and bring this mixture to a boil. Add the chili powder and turn down the heat to low-medium. Let the sauce to cook for about 20 minutes or until it is reduced a bit. Once it is done, taste it and add salt if needed.
  • Shred the chicken by hand or use a fork. Once the veggies are cooked, add the chicken to the mix and cook it for a few minutes. Then, once the salsa is cooked, add about half of it to the chicken mix. Reserve the rest of the sauce.
  • Add 2/3 of the Mexican cheese to the chicken mix and turn off the heat.
  • Lastly, use a spoonful of sauce to “grease” a 13X9 baking dish. You may use a cooking brush to spread the sauce evenly on the bottom of the pan.  


Assembling the Enchiladas:
  • Preheat the oven to 350 degrees.
  • Place a generous amount of chicken mix on a tortilla.  Roll the tortilla and place it in the baking dish with the seam down.  Repeat this step as many times as needed to fill the baking dish.  I used seven flour tortillas.
  • Pour the remaining sauce on top of the tortillas, and use a brush to distribute the sauce evenly. Sprinkle the additional Mexican on top.
  • Lastly, place the enchiladas uncovered in the oven for about 15 minutes, or until the cheese is melted.


Enjoy!


Monday, April 8, 2013

Mediterranean-Inspired Burgers


On an impulse, I purchased a tzatziki sauce and some feta cheese a few days ago.  I’ve always liked the taste of this succulent sauce on gyros, but I didn’t know what to do with it at home.  Finally, inspiration struck. Here are two delicious recipes.

Mediterranean-Inspired Burgers

I cannot claim I know anything about authentic Greek food (I really don’t!), but here is my attempt to capture some of my favorite flavors.


Ingredients:

For the beef patties
1 lb. Ground Beef
1 Swanson Flavor Boost pack (beef)
1 egg
1/4 cup of bread crumbs
A pinch of pepper

Mix these ingredients listed above and make the burger patties.  My mix yielded 5 burgers. Cook according to your preferences.   


For the burgers
Buns (of course!)

Toppings
So delicious!
Lettuce or spinach (I used spinach)
Sliced tomatoes
Sliced cucumbers
Sliced red onions
Sliced roasted red peppers (I buy these in jars at BJ’s - delicious!)
Feta cheese
Le Grand Tzatziki Sauce


I piled the toppings in the order listed above, though I placed the patty on top of the feta cheese before I poured the tzatziki sauce on it.


Additional Meal: Chicken Wraps

Here is the miracle sauce!
Mix rotisserie or cooked chicken with chopped red onions and peppers, and add the tzatziki sauce to taste. 

I poured a generous amount of the chicken mix on top of lettuce and feta cheese on a wheat tortilla. Then, I tightly wrapped this tasteful mix. Delish!

Sunday, January 13, 2013

Quick Black Bean Chili

Quick Chili with black beans and corn bread

Despite my failure to post updates for a couple of months, I have been able to continue cooking and eating at home (I swear!). 

In the last few weeks, I have experimented by making up by own recipes or tweaking other people’s recipes. One of my most successful “inventions” is the quick chili I made twice already this year (2013).  Chili usually takes some time, so I found a few shortcuts to help me get results in a fraction of the time without sacrificing flavor. Here is my recipe for a super quick chili. Hope you like it!

Ingredients:

  • 1 lb. of ground beef (I used lean beef with very little fat)
  • 1 can (15 oz) of black beans
  • 1 can (15 oz) of diced tomatoes (I used a “roasted tomatoes with garlic and basil” can)
  • 1-2 cups of chopped onions and green/red peppers
  • A pinch of cumin
  • Chili powder to taste
  • Salt and Pepper to taste


For the cornbread:

  • A box of Jiffy mix for cornbread and the ingredients listed on the box
  • 1/3 can (about 4 or 5 oz.) of creamed corn


Making the Chili:

Sautéed the onions and green/red peppers in a bit of olive oil.  Then, remove these from the frying pan.  Use the same frying pan to brown the ground beef so that it “absorbs” the taste of the onions and peppers.  As the meat is cooking, add the cumin, chili powder, salt, and pepper.  If you want, you can also add minced garlic to taste. 

Let the meat cook well; then, add the cooked onions and peppers.  Taste this mixture to make sure it has enough salt and pepper.  Then, add the diced tomatoes and crush them as they cook.  They will make a nice sauce as they cook with the meat (10-15 minutes).

Taste the sauce to make sure it doesn’t taste like raw tomatoes.  Then, add the can of black beans (I drained some of the water first).  Let this mixture cook for a few minutes.

Making the cornbread:

Follow the directions on the box, but use only half the milk and add the creamed corn instead.  I used a shallow pan to make bread instead of corn muffins, and this worked out just fine. 


Friday, November 16, 2012

Easy Turkey Meal

[pictures of this meal coming soon] 

In more than a decade of marriage, I have never celebrated Thanksgiving at my home. Now, it just doesn’t seem right to change what has become our tradition, and to be honest, I don’t mind visiting my husband’s relatives. The food served at their home is great, and the company is even better.  However, I cannot pretend I never wondered what it would be like to host a Thanksgiving meal.  I even bought The Food Network magazine last year, and I drooled over the pictures of juicy, meaty turkeys and scrumptious side dishes. However, it wasn’t until this year that I decided to go for it.

I could not possibly host Thanksgiving at home, but would it be okay to do a pre-Thansgiving/sort-of-Halloween dinner? “Why not?” I told myself.  After all, there is nothing wrong with planning a family meal.

I invited my husband’s parents, his brother and his family, and my mother to join us and eat my very first turkey meal.  They eagerly accepted, and I began to plan the menu. However, there was a problem I needed to overcome if I was going to make this recipe work for my family: proper brining.

I began with this recipe by The Food Network Magazine, but I immediately knew I wanted to make  a few changes. For instance, the choices for liquid brines were too risky for me (this was my first turkey, so I didn’t want to experiment!).   I’ll save these options for next time. The classic brine was perfect, but it was dry, and I want the juiciness of the other choices. I also wondered where I was going ot keep the turkey while I brined it. I realized early on that I needed
  • A fool-proof brine/seasoning
  • A place to brine

So… I tackled the first issue by making my own recipe for the brine

Ingredients:
  • Salt to taste (I used about half a cup, but traditional brine recipes can require two cups of salt or more)
  • Two Swanson flavor boost packages – chicken flavored (next time, I might use one or two more)
  • Two rosemary branches
  • A couple of onions and peppers, cut in half.
  • Garlic to taste (you can use cloves or powder; I prefer cloves)

I mixed all of these ingredients in a pot full of water (enough to cover the whole turkey) and let it boil. Then, I let this broth simmer for a bit to mix the flavors. This became my brine.

Brining the bird for 24 hours was the next challenge. There is no way my larger than normal pot would fit in my two-door refrigerator.  The solution came to me by chance.  As I was looking for a thermometer at the store, I came across a basting bag. Can you believe someone makes this item? The bag looks like a giant Ziplock bag for a giant, 20 lbs. turkey.  Jackpot!  I paid less than $3 for the bag – worth every penny.

So, on the day before my big turkey dinner, I made my brine. Once it cooled down, I put the turkey and the liquid brine in the back, and I place this bag in my refrigerator. I had to remove the bottom vegetable drawer to get the turkey in, but other than that, brining took no effort whatsoever.

I followed the mixed and match recipe from Wegmans (link) for the rest of the process, and I used the rosemary lemon butter (I skipped the fennel).  I don’t want to brag, but the turkey was awesome! My six-year-old nephew had seconds.  That is the best compliment I got that night, but not the only one. 

I served three side dishes with my turkey and spent about $40 or $50 dollars (about $20 for the turkey).  However, I was able to feed 7 adults and one child (my kids don’t eat turkey); I also had leftovers to make other meals for the rest of the week.  Not a bad deal!

Friday, October 19, 2012

Weekly Menu


I followed a friend’s suggestion and made a whole week’s menu ahead of time.  I have to say that this is the way to go if your main concern is the dreaded nightly question, “what’s for dinner?”  However, it takes a lot of time to plan a weekly menu, particularly when I have to consult cookbooks or the internet to find the recipes :-)

I don’t clip coupons or review grocery store mailers.  Maybe I should do that and save some money! However, for my first weekly menu, I focused on creating a simple, easy to follow menu that would help me get dinner done efficiently and painlessly. 

Here is my menu: (click on the links to see recipes)

Wegman's Chicken
  • Beef in sauce, rice, and veggies. Meal courtesy of my mother, who cooked the whole thing. Thanks, mom!
  • I used a pre-seasoned Wegman’s chicken and served it with mashed potatoes. The chicken was only $8 – what a deal!
  • Quesadillas: I followed a recipe that uses chopped zucchini, squash, portabella mushrooms, onions (sweet onions are the best), jalapenos or peppers (your choice), and Mexican cheese.  I sautéed all the veggies first. I added shredded rotisserie chicken as well. Then, I fried the quesadilla and served it with sour cream.
  • Calzones and French onion soup.  Yes, I made the soup. Here is the recipe (this soup was delicious!)
  • Meatloaf, rice, and steamed veggies (carrots, snap peas, and zucchini) in basting oil. This was my first time making meatloaf, so I found this recipe: Mix and Match Meatloaf.  Did I follow the recipe? Of course not! I used tons of veggies: Shredded zucchini, shredded carrots, chopped onions, and chopped peppers.  I sautéed them in olive oil and mixed them with the beef before I made the loaf. I also added a Swanson flavor boost package to the mix.  Turned out great!
  • Naan Pizzas. Enough said.
    Note: I usually follow the basic recipe but change the toppings.
  • Spaghetti and meat sauce. This classic never goes out of style.
Food Network Meatloaf
So…I tried to stick to the menu, but I made some changes.  I switched the order of the menu, and I let my husband talk me into eating Popeye’s one night.  Overall, this plan was a success, but I think I can do better.
The new recipes, such as the one for French onion soup, added an interesting challenge to the whole plan, but I’m glad I added them. Once I was done cooking the new dishes, I felt proud of myself.

Will I use a weekly menu again? Absolutely.
Will I stick to the menu next time? Hmm… I’ll try. 

Weekly menus are a great tool for people like me. 

Tuesday, October 9, 2012

Basil Pesto to the Rescue


At about $3.50 per jar, Wegman’s Basil Pesto sauce has become a must-have item in my kitchen. I never used pesto before, but I decided to buy a jar to recreate a chicken pesto Panini that is sold at Wegman’s for $6.50.  In the last few weeks, I’ve use two of these jars already to create pasta dishes and pizzas, and I absolutely love it! This is an ingredient that is not dirt cheap, but it isn’t expensive either. 

Wegman’s Chicken Pesto Panini

You will need a Panini maker, of course.  I began with Wegman’s recipe for a Margherita Panini, which calls for their Italian Pane bread. However, I discovered that regular sandwich bread is just fine.  

You’ll need:

  • Sandwich bread (I used Nature’s Own Honey Wheat)
  • Chicken (I shredded rotisserie chicken.  It is less expensive that any pre-packaged chicken, and way more delicious!)
  • Roasted red peppers, cut in strips (I bought a couple of jars at BJ’s Wholesale, but you can find these jar at any grocery store)
  • A ball of mozzarella cheese, sliced
  • Basil Pesto Sauce

Spread the pesto sauce on the bread and pile all the ingredients listed above to taste.  I use only a few strips of roasted red peppers to add flavor, but if you really like the taste, you can add more.

Last night, I served this dish with macaroni and cheese.  It was a hit!

Chicken Panini with Macaroni and Cheese


I cooked regular, cheap macaroni and added a cream sauce I found a Wegman's, but I imagine that any macaroni and cheese side will do. 

Thursday, September 27, 2012

Lasagna Night


What can I make with the stuff on my kitchen shelves? Time to raid my cupboards!

I'm saving money by using what I already have
in my cupboard. 
I found two half-used boxes of lasagna shells, so… Lasagna it is.

Lasagna is definitely a versatile dish, since most of us have everything we need in our kitchens already.  The only ingredient I don’t have sometimes is ricotta cheese, which acts as a “glue” to hold the dish together.  However, in a pinch I can use my mom’s recipe for what I call “Lasagna Glue.” Scroll down for the recipe.

Here is my Last-Minute Lasagna recipe.

You will need:

Lasagna shells
1 lb. Ground beef
½ pepper, chopped
½ onion, chopped
1 jar of your favorite tomato sauce. I recommend Wegman’s Tomato Basil sauce.  It is cheap and very tasty.
Ricotta cheese. If you don’t have it, use the “Lasagna Glue” (see below)
16 oz. Mozarella Cheese
Parmesan Cheese to taste

The first step is to cook the peppers and onions in a couple of teaspoons of oil (I used olive oil).  I then remove these veggies and cook the ground beef in the same oil, which is now infused with veggie flavor. You may add a bit of garlic to cook with the beef if you wish; I do this sometimes.

Once the meat is cooked, I return the veggies to the pan and add salt and pepper to taste. I let all these ingredients cook together a bit longer (about 5 minutes).

In another pot, I cook the pasta shells according to the instructions the package. 

Assembling the lasagna:

I begin by covering the bottom of a 9x13 cake pan with tomato sauce.  Some people might use oil instead. Then, I make a layer of pasta shells, ricotta or lasagna glue, ground beef, more tomato sauce, and mozzarella cheese.  I then repeat this step as many times as I can.

The final step is to make a final layer of lasagna noodles and cover it with tomato sauce, mozzarella cheese, and parmesan cheese (in exactly this order). 

I cover this dish with aluminum foil and cook it in a preheated oven (350 degrees) for about 20 minutes. Then, I remove the cover and cook the lasagna for another 10-15 minutes.  Everything in the dish is already cooked, so just make sure that the cheese is melted, and you’ll be just fine.

Note: I used to heat/cook the pasta sauce before using it so it didn’t taste “raw,” as it happens with many tomato sauces.  I find that I don’t have to do this with the Wegman’s sauce, but definitely had to do it when I used Ragu, for instance. Though the sauce was okay when used “raw,” the flavor seemed to improve quite a bit when I “cooked” it.

Lasagna Glue

You will need
3 cups of water
2 tablespoons of flour
1 tablesppon of butter
Salt and pepper to taste

In a small pot, heat two cups of water until it boils.  Meanwhile, combine in a bowl the remaining cup of water with the flour so that it dissolves. Add this mixture and the tablespoon of butter to the boiling water in the pot.  Stir constantly until a nice, homogenous mixture emerges.  Add salt and pepper to taste.
Optional: Add any herbs or spices you’d like.

Use this mixture in place of the ricotta cheese.

This dish is not as good as when I use fresh lasagna sheets (available in my supermarket), but it was pretty good, and a bit cheaper.  This was definitely better and cheaper than eating out!